
On Windows 11, the command-line interface is provided by WMIC or Windows Management Instrumentation Command-Line Utility. It works with your Windows computer’s shells and utility commands. WMIC is included in Windows 11 Build 22572 from Microsoft. It’s an optional feature that may be turned on or off directly from inside Windows 11. This Guide will show you that how to uninstall and reinstall WMIC with Windows 11 (22572). This article will go through how to uninstall and reinstall WMIC in Windows 11.
Uninstall And Reinstall WMIC In Windows 11 Using Settings
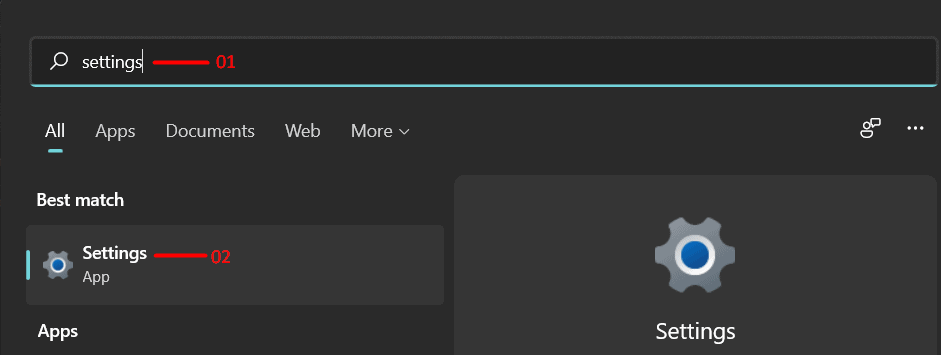
The Settings app is the first option for uninstalling and reinstalling WMIC on Windows 11. Follow the instructions below to delete and reinstall WMIC in Windows 11 using the Settings app: Also Check : Fix Error 0x80080005.
- Using the Windows + I key combination on your Windows 11 PC, you may access the Settings app.
- Go to the Apps area from the left sidebar in the Settings app.
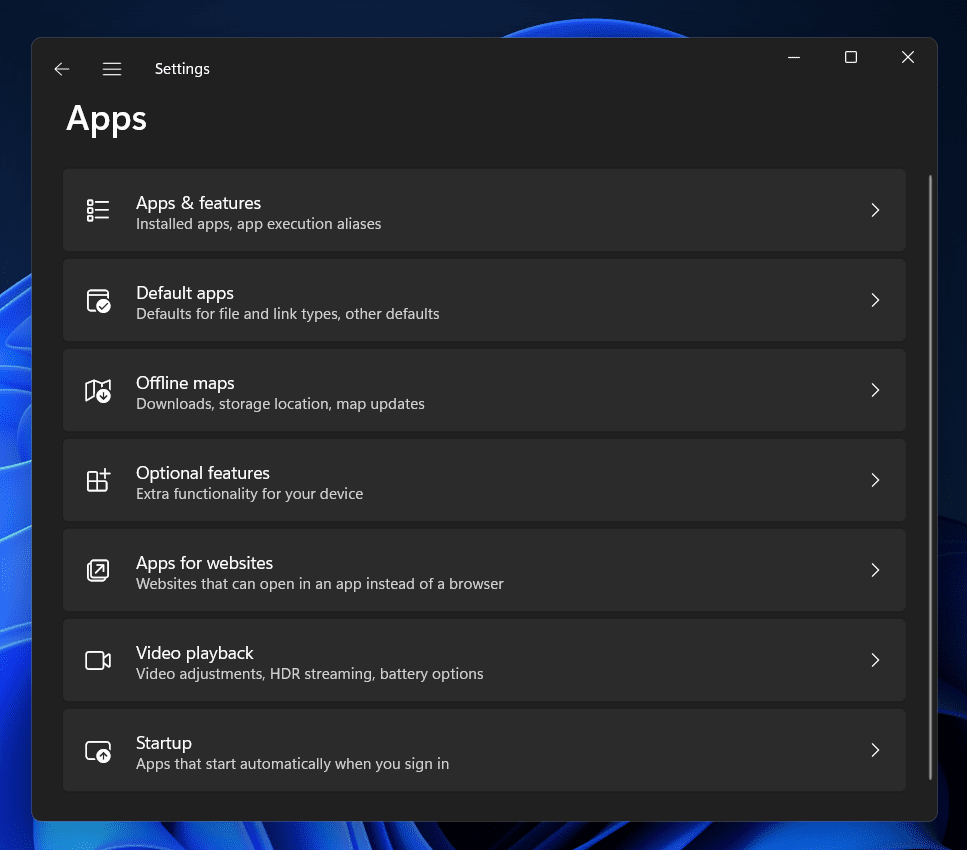
- Click Optional features on the right-hand side of the Apps section.
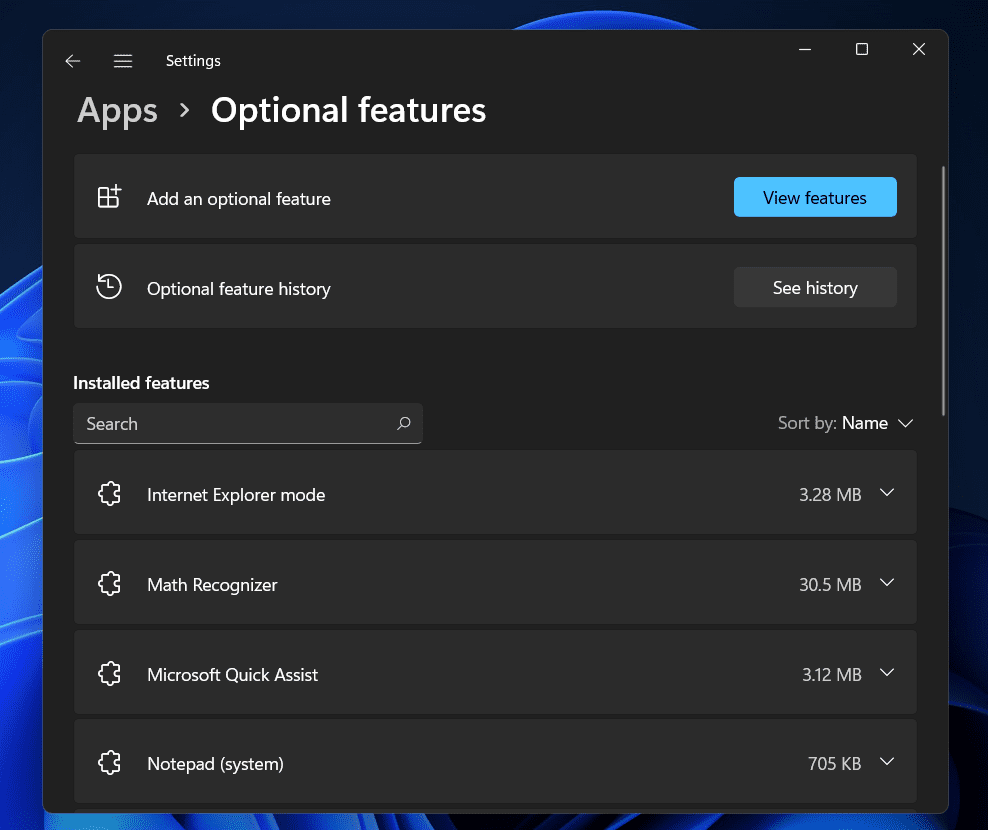
- Find the WMIC option under Installed Features and expand the area by clicking the down arrow next to it.
- After that, click the Uninstall button to remove WMIC from your computer.
- This will remove the WMIC from your Windows 11 computer. Follow the steps outlined below to reinstall the WMIC.
- To enter the Settings app, press the Windows + I key combination on your keyboard.
- On the left sidebar of the Settings app, select the Apps area.
- Click on Optional Features on the right, and then the View Features button.
- Now, look for WMIC and select the checkbox next to it.
- After that, click Next, then Install to Reinstall the WMIC on your computer.
Uninstall And Reinstall WMIC In Windows 11 (22572) Using Command Prompt/Windows PowerShell
Using the Command Prompt or Windows PowerShell is another approach to remove and Reinstall WMIC with Windows 11 (22572). To uninstall and Reinstall WMIC in Windows 11, open the Command Prompt or Windows PowerShell with administrator capabilities on your Windows 11 PC and run the add or remove the command for WMIC. The procedures for uninstalling and Reinstalling WMIC on Windows 11 (22572) using Command Prompt or Windows PowerShell are listed below. Also Check : Windows 11 Media Creation Tool.
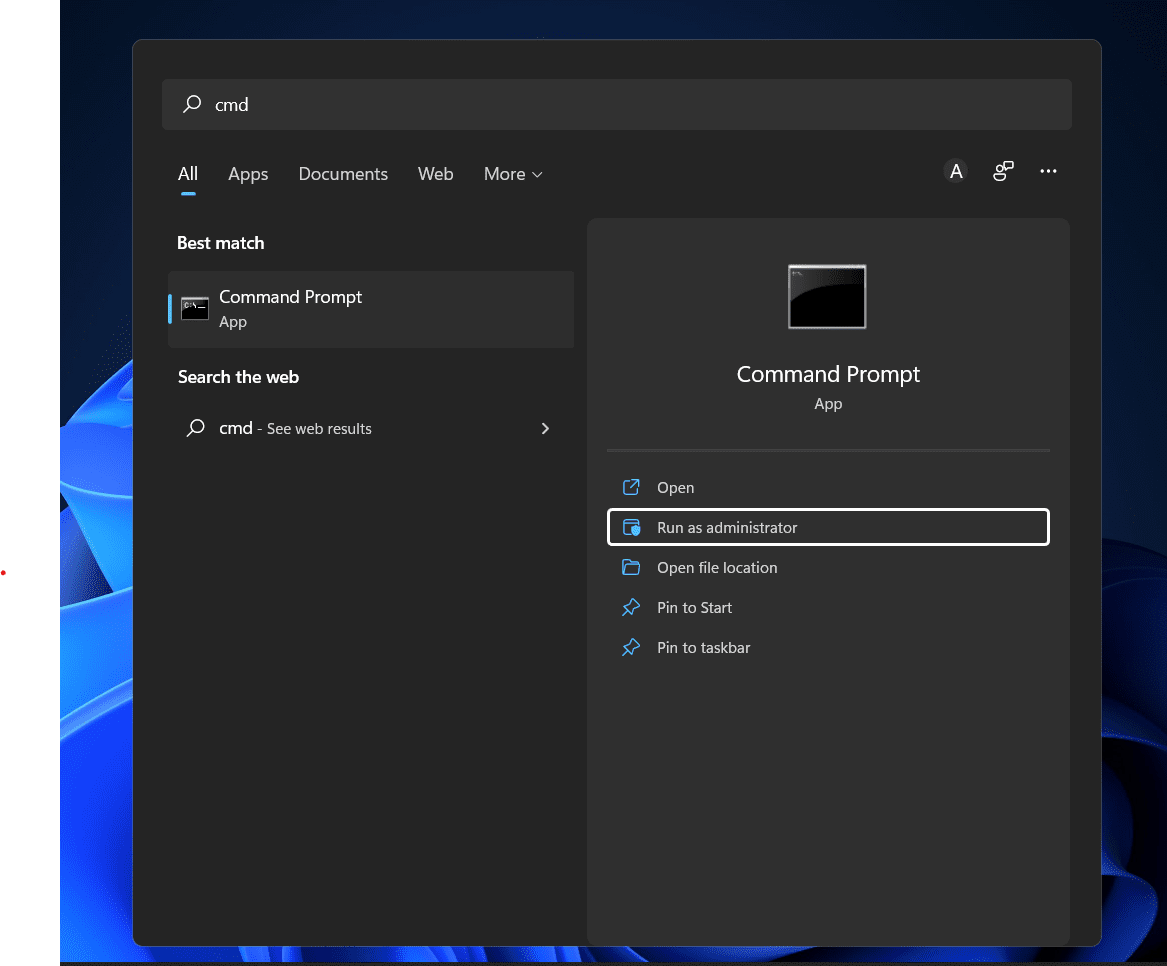
- By tapping the Windows key on Windows 11, you can access the Start Menu.
- Look for CMD in the Start Menu. From the search results, right-click Command Prompt and select Run as administrator. Alternatively, you can run Windows PowerShell as an administrator.
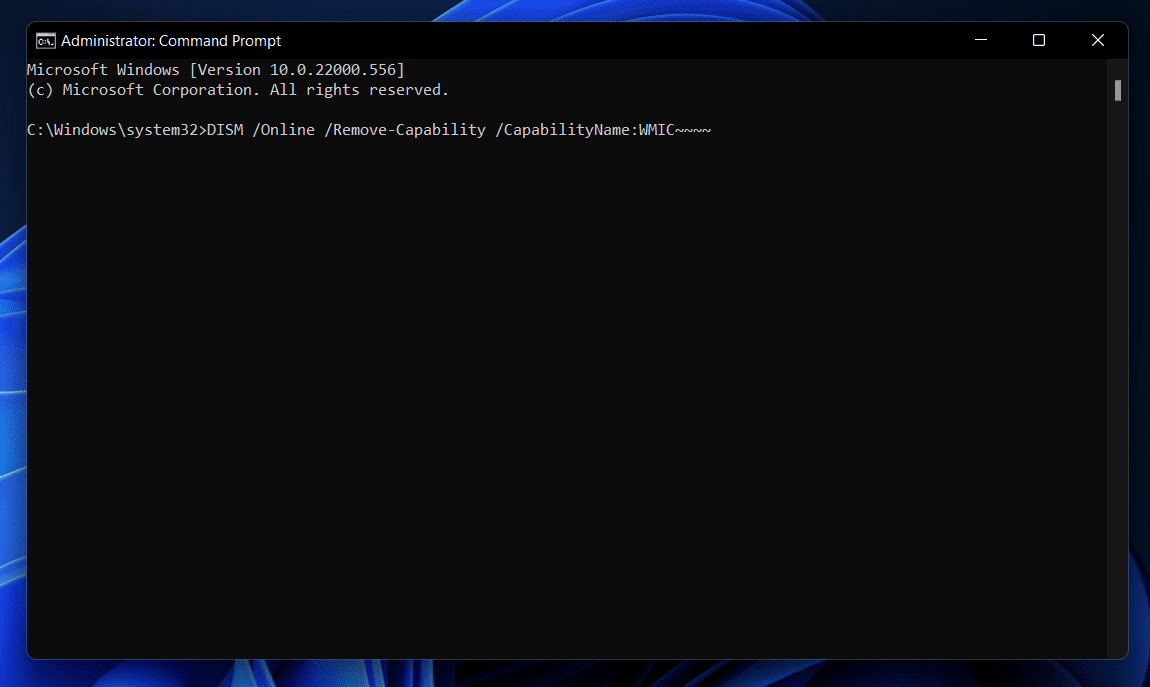
- Now type DISM /Online /Remove-Capability /CapabilityName: WMIC and hit Enter to uninstall WMIC in Windows 11. This will remove the WMIC from Windows 11.
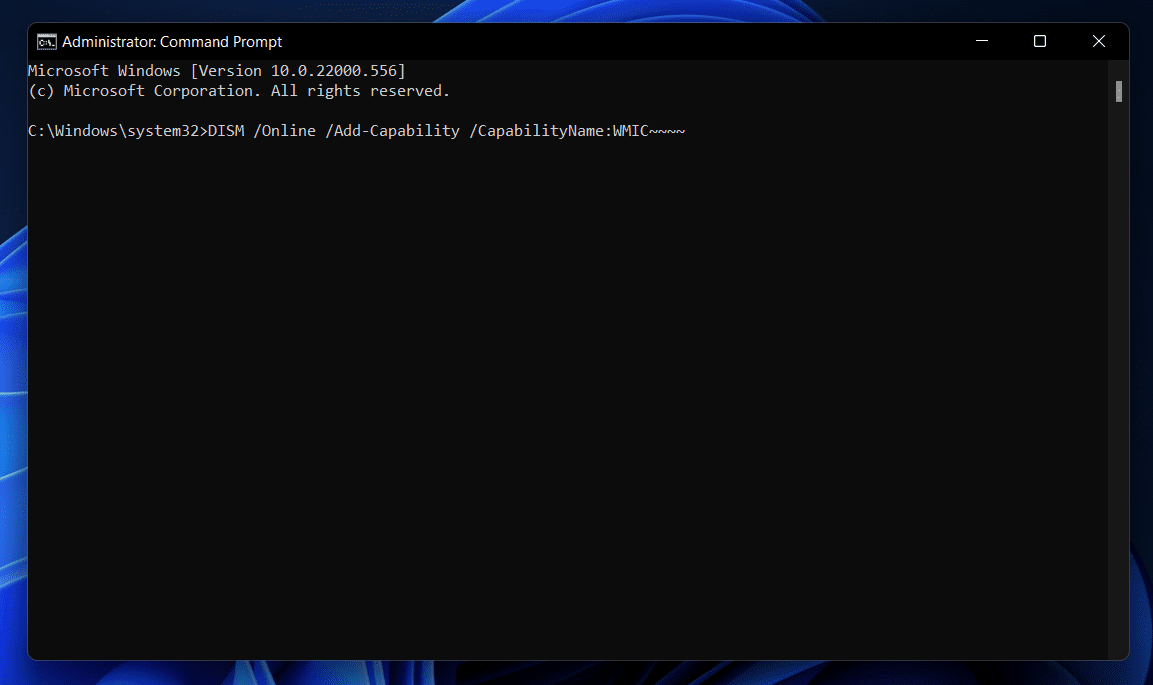
- If you wish to Reinstall WMIC in Windows 11, execute DISM /Online /Add-Capability /CapabilityName: WMIC and press Enter.
Final Words:
These are the two methods for removing and Reinstall WMIC In Windows 11. (22572). You can use the procedures in this article to add or remove the WMIC on your Windows 11 PC if you’re using Windows 11 build 22572. In addition, you may remove and Re-Install WMIC In Windows 11 PC by following the steps above.